UNDER CONSTRUCTION
The Art of the Ambush
A Study on Tackler Tactics by SolidersFortune
Alright here is a intermediate guide on Tacklers. I have tried to be very thorough, but I may still add things in the future.
TECHNICAL STUFF
Tacklers are fighter craft that have been fitted with the Federation-developed ODG Chameleon cloaking device, which allows them to bend light waves around their armor and appear invisible for 18 seconds. Most of these devices have a recharge time of 30 seconds, rendering the ship incapable of cloaking for a minimum of 12 seconds after decloak. All known variants of the Chameleon device deactivate upon collision, taking fire, or using an active module/weapon.* There are two variations of the Tackler: Federation and Jericho.
Federation Tacklers are built for speed and maneuverability. Most variations have a higher natural top speed than their Jericho counterparts. These ships are designed for hit-and-run tactics; taking the enemy by surprise before disappearing again and leaving the target distractedly searching for the attacker (leaving them wide open for a finishing shot from a wingman). However, this also means that they are relatively weak in comparison, and cannot withstand a focused bombardment.
Jericho Tacklers are built for forceful ambushes. All variations have a higher shield rating than their Federation counterparts, and are able to absorb more shots. However, they are also much slower than their Federation cousins. These ships are designed for ambushing a target, sticking around to finish them off, and then disappearing before backup arrives at the scene. Note that while Jericho ships have more shielding than Federation ships, they are still not proper tanks. If anything, they are a middle ground between the Empire’s extreme armor and the Federation’s speed. Treat them accordingly.
TACTICS
SERPENTINE!
Too many pilots meet an early end when flying Tacklers because they fail to realize a simple truth; Just because the enemy cannot see you, does not mean they cannot shoot you.
When you engage your cloaking device, alter your ship’s trajectory. Do a spin, or a loop, or a split-S. It doesn’t matter, so long as you do not continue to travel in a straight line. I have killed many stupid pilots who engaged their cloaking device and never altered their trajectory because they believed they were safe.
Lasers are your worst nightmare, and will easily decloak you if the enemy figures out your last direction of travel and loops their weapon around that area.
THE RULE OF TWO
Every good pilot knows this rule. It is summed up by the more familiar phrase “stick with your wingman”. If at any point during a large-scale military engagement you find yourself flying solo, immediately look for another ship to join. A lone pilot is a dead pilot. If you do not have open comms with the other pilot, put your ego aside and let them lead. Follow their every move and attack the targets they attack (unless they are attempting to fly in open space behind enemy lines in the infamous ‘lone-wolf’ style). The only time you should ever break off from your wingman is to engage a ship attempting to intercept you wingman.
DON’T BE A HERO
The only good hero is a dead hero. No, seriously. Heroes get others killed and lose games. Your job as a Tackler pilot is to assist your team by forcing the enemy to stay in cover and running down ships that are out of position. Focus on helping your team finish off wounded ships running for cover, or defending your team from faster enemies attempting to flank.
Don’t try to kill the entire enemy team by yourself by being the lone-wolf behind enemy lines. All it takes is an enemy Recon and Tackler working together to make you a corpse. And trust me; Recons eat lone-wolf Tacklers like candy.
Your runs into enemy territory should be less than a minute in duration, and you should always have an escape plan besides simply cloaking out. Running in at the front of the enemy formation with your guns blazing, and hoping that your cloak will get you back out alive when you hit 10% hull strength is beyond stupid.
You are a scalpel, not a spiked baseball bat.
COVER IS YOUR FRIEND
If you are one of the many cruise-tackler pilots out there, your ability to travel at +600m/s can make it very tempting to fly out in the open. Here’s a helpful hint: Don’t. If you are out in the open, behind enemy lines, and have the misfortune to encounter a micro-locator, you are screwed. Period.
Keep close to cover, and use it as a natural way to stay hidden from sight without using your cloak. There are several important reasons for this:
1. If you are tagged with a spy drone, you will have an object nearby which you can use to scrape it off your hull.
2. If the enemy has place a micro-locator, you still have options for breaking line-of-sight even if you can’t cloak.
3. If the enemy has a Guard in their ranks with a pulsar/mass-propulsion inhibitor combo, you can hide behind cover until the modules have expired, allowing you to escape/cloak or counter-attack.
4. Natural anti-missile defense. So you don’t have to use your cloak every single time an enemy launches one at you.
FIGHTING ON ALL AXIS
Too many pilots these days view flying in low-orbit as if it were just a zero-g version of flying in atmosphere. There is a deadly flaw with this comparison. Unlike atmospheric engagements, there is no correct orientation. Sure, most pilots will designate the planet below them as ‘down’, but in reality that is nothing more than personal preference. In space, your ship is capable of movement along any axis, at any angle, with no impact on aerodynamics.
Because of flawed thinking, enemy ships will usually be spread out in such a way that their attention and sensors are focused directly to the front and sides. An attack from the underside at the rear of their formation is both unexpected, and undetectable from the frontline. Properly executed, this maneuver can be repeated until the enemy force adjusts their formation to compensate, which in-turn can ease pressure on your allies.
KNOW YOUR ENEMY
Knowing the proper tactic for taking down an enemy ship is key to success as a Tackler pilot.
In general, Tacklers should prioritize enemy Recons and other Tacklers, as these two ship types will hinder future successful attack runs.
In general, a Tackler’s attack run usually involves cloaking, moving into position, and then uncloaking once in-range to use the 20% damage boost to eliminate or wound the chosen target quickly before darting back to friendly cover. However, there are some ship types you will want to use your cloak defensively against, as they have easy counters to a sneak attack.
COMMAND:
The first are Command fighters. If they are ambushed, the first reaction of a Command pilot will be to activate their diffusion shield, removing the element of surprise and allowing them to return fire unscathed. Save your cloak. Attack them openly without using cloak and when you see their diffusion shield activate, engage your cloaking device. You will remain invisible longer than their shield will stay up. Be wary that a Command fighter can mount Ion Warheads which will reset/disable your active modules, as well as a powerful “Valkyrie” damage boost which can mulch your armor in seconds.
ECM:
The second are ECM interceptors. These guys have a nasty metastable field that makes them invulnerable. Attack them openly and wait for them to activate the field. When they do, cloak and wait until the field begins to glow white, and then fire off a missile. If that doesn’t finish them off, your damage-boosted guns will.
GUARD:
The third type are Guard Frigates. A Guard with a mass-propulsion inhibitor, pulsar, and mass drivers is easily the most deadly combination against a Tackler. DO NOT engage a Guard by yourself unless you are the last man standing. If you are the last man standing, ensure that you have eliminated all other ship types before attempting to hunt a Guard. If you do not have a Target Painter equipped, you will not be able to kill the Guard fast enough to out-damage his heals. A smart Guard will have TWO shield heals.
The absolute last place you want to engage a guard is in open space. In this scenario, any prolonged exposure means death. Fortunately for you, the Guard will naturally want to move toward cover to protect himself from circle-strafing, as well as giving him objects to detonate EM Torps against.
Avoid making head-on passes at the Guard, as you will most likely wind up eating an EM Torp (Which can be fired from ANY angle). Maintain your distance outside of the propulsion-inhibitor field and keep moving around the Guard’s rear and bottom side, where his turrets have the worst firing-arc.
If he draws a bead on you and you start taking too much damage, cloak up, evade, and move to cover. Note that this cover should be large enough to protect you from the blast of an EM Torp.
Wait for the Guard to make a mistake. Maybe he will waste a heal, or take damage from his own EM Torp, or have his shield modulated to the wrong damage type. Hopefully you have two different damage types equipped between your missiles and your guns…
Pray.
TACKLER:
There is a simple rule in Tackler duels; The first one to cloak out, dies. Your goal when engaging another Tackler is to make them cloak before you do. Generally a Tackler pilot relies on his cloak to break inhibiting effects and debuffs. Once his cloak expires, he is vulnerable for 12 seconds.
Attack the enemy Tackler first, and make him panic. Once he cloaks, do the same and wait for him to re-appear. When he does, get in behind him and snag him with an Engine Suppressor or an Inhibitor Beam and rain fire.
Profit.
RECON:
These are the Tackler hunters. Surprising a competent Recon pilot can be very difficult because they often stick to regions where they have place micro-locators. Before engaging a Recon, try to spot any micro-locators in the area, and dispatch them with a missile. Then, use your cloak to surprise him with a full alpha-salvo. Goodness knows you probably won’t be able to cloak out of the situation if the Recon has spy drones, so making the first punch hurt as much as possible is paramount. Also: cover. Do not expect to out-dogfight a Recon. Try to get them when they are distracted with an objective or fighting another player.
If the Recon micro-warps away, only attempt to follow if he has warped into your territory and is below 50% health. NEVER follow a Recon behind enemy lines.
EQUIPMENT
FITTING THE TACKLER
Lately the Tackler class has been getting a lot of hate, and rightly so. Many pilots have been abusing the Tackler’s natural ability to launch sentry drones by equipping both the Sentry and the Heavy Guard, and then cruising around the battlefield, pooping out drones behind rear-guard frigates before cloaking up without ever having taken fire from their intended target.
This is an unbelievable waste of the Tackler’s potential, and a sure sign of a lazy and incompetent pilot.
IMPLANTS
Having the right crew at the helm of your Tackler is just as important as having the right equipment and weapons. Here are some general guidelines. Implants marked with (*) are exceptions to the ‘essentials’ core list.
ESSENTIALS:
Rank 1:  +20 Points Hull Resistance
Rank 3:  +20 Points Shield Resistance
Rank 5:  +30% Rotation Speed
Rank 7:  -17% Afterburner Energy Consumption
Rank 8:  5 Seconds Engine Inhibition Immunity upon activation of Multipurpose Modules
Rank 9:  +12 Points Resistance to Shield and Hull for every Enemy Lock
Rank 10:  +20% Active Module Stats
Rank 11:  -8 Points Resistance to Enemy Target (Main Weapon)
Rank 13:  +1% Damage per Enemy Destruction up to Maximum +10%
Rank 14:  7 Seconds Negative Effect Immunity upon Shield Loss
Rank 15:  +3% Weapon Damage
CRIT BUILDS:
Rank 2:  +43% Lock Speed, +10% Crit Chance
Rank 4:  +10% Missile Damage
Rank 6:  +30% Crit Damage
Rank 12:  +7% Weapon Damage below 50% Speed
RANGE BUILDS:
Rank 2:  +75% Sensor Range, +20% Maximum and Optimum Weapon Range
Rank 4:  +75% Missile Range
Rank 6:  +30% Kinetic/EM Projectile Speed, -10% Thermal Overheating
Rank 12: +7% Weapon Damage below 50% Speed
CRUISE ENGINE BUILDS:*
Rank 2:  -23% Controlling Effect Duration, -20% Weapon Spread
Rank 4:  +20% Missile Speed and Rotation
*Rank 10:  -29% Active Module Energy Consumption
Rank 12:  +50% Energy Regen below 50% Speed
BUILDS
While there are many, many possibilities for effective Tackler fits, I’m choosing to focus on just a few that work exceptionally well for the sake of simplicity. The ships I have chosen are merely for demonstration purposes. Feel free, as always, to experiment.
The ALPHA (Crit Build)
Purpose: Deal as much Alpha damage as possible in a single burst.
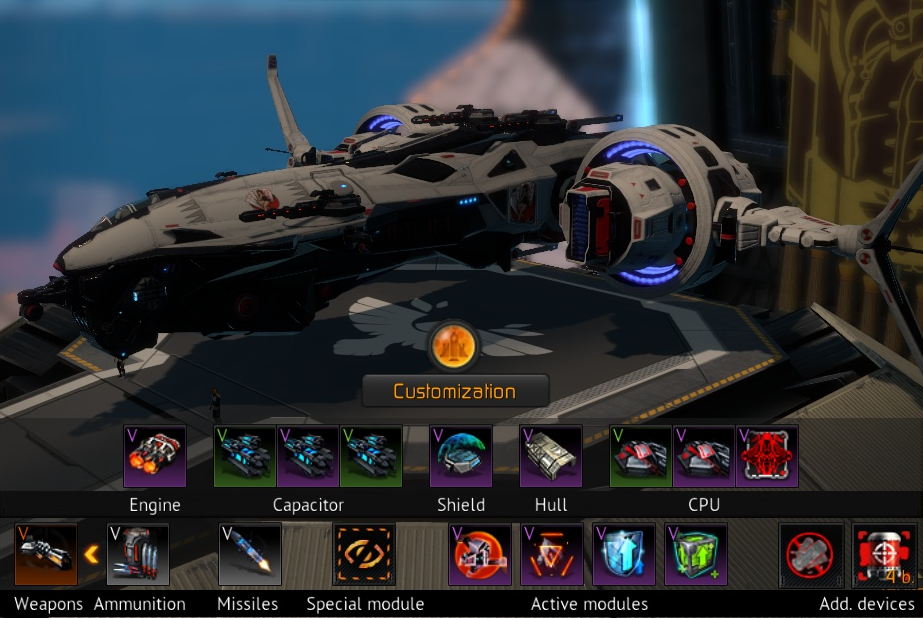
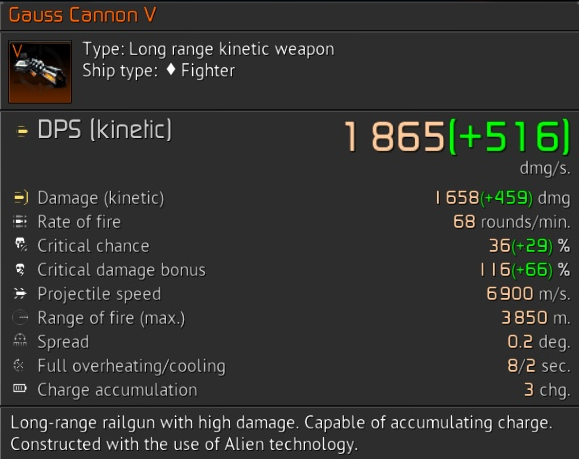
Gauss Cannons double their Crit Chance with every charge, so a Crit Chance of 36% x3= 108% at full charge. This particular Jaguar is not able to maintain Cruise indefinitely, as the Pulse Dischargers drain energy. On most Cruise Engine builds, it is better to use Iridium Heatsinks as a way to increase DPS rather than Pulse Dischargers, as they do not compromise energy stability. Unfortunately, increasing the firerate of Gauss does very little for the weapon, hence the exception.
The TROOPER (Crit Build)
Purpose: Consistent damage over time.
This is a ship designed for consistent damage over time, rather than burst damage. The Sentry Drone is key to help the pilot maintain the edge in a dogfight. The extra Rotation in the engine slot helps offset the Galvanized Armor.
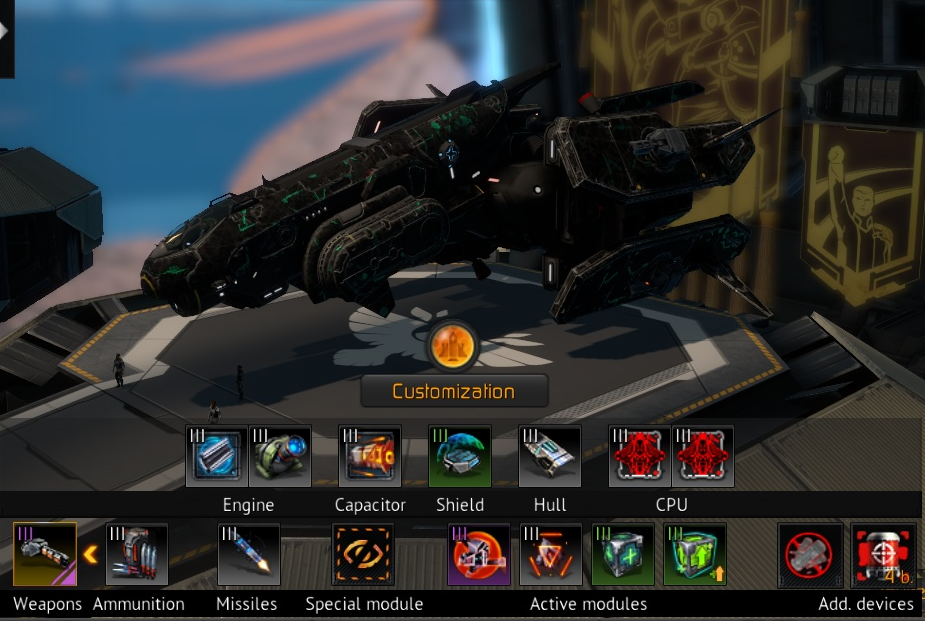
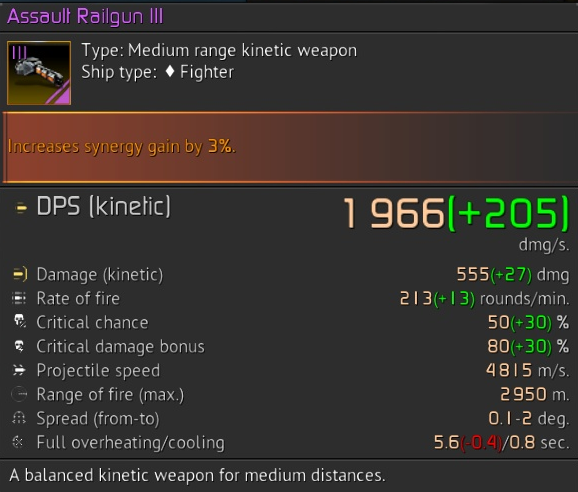
The HUNTER (Range Build)
Purpose: Intercept and disable high-mobility targets at any range.

A Tackler designed to hunt enemy Tacklers. Weapon damage isn’t as important as Range, so Targets can be intercepted and incapacitated before they are able to return fire. Note that this build does make use of the Iridium Heatsink in place of a Pulse Discharger.
EDIT: I am not quite finished with the Fitting section, as there is a lot to cover. Will update as I have time.
 In this case: charge, strafe out of cover, shoot, strafe into cover, repeat. His mass driver won’t have time to do enough damage since you are the one strafing. Like you say, it will take a long time though. Tacklers have the advantage of 3 damage types, so they are good for killing guards
