TACKLER 101: INTRODUCTORY HANDBOOK
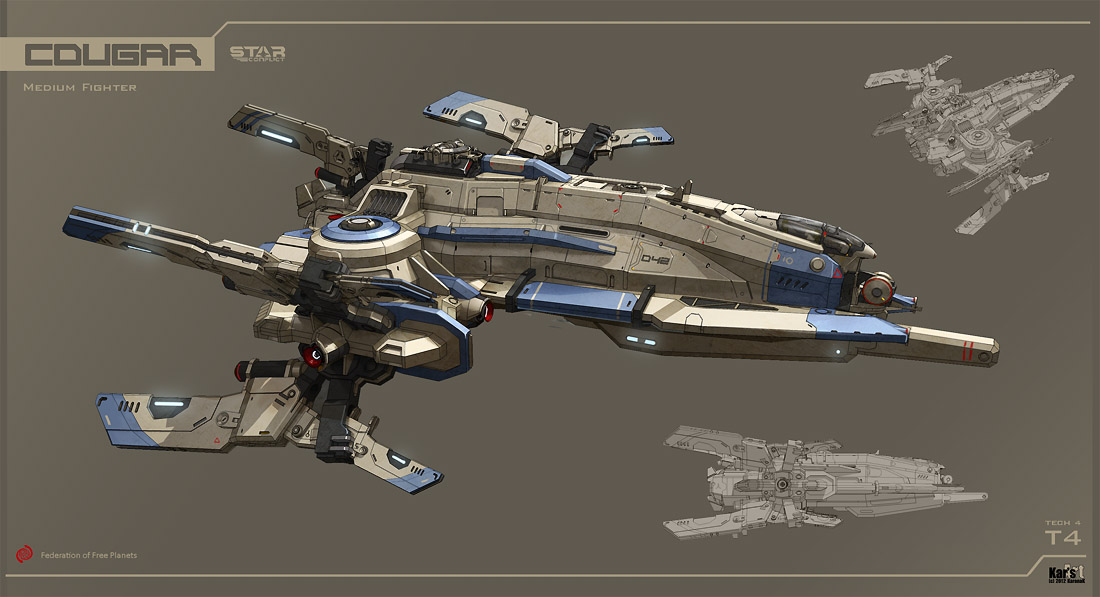
Artwork by KaranaK
This is an introductory handbook to tacklers that covers the basics of tackler play from T1 up to T3. Please feel free to comment if you have any opinions, or if you spot any mistakes.
Handbook last update: Sept 23, 2014.
Since the v1.0.2 patch my OS is no longer supported. Unless I find replacements for my apps that require my current OS I won’t be able to run SC at all, so this guide will no longer be updated until further notice.
Why Fly A Tackler?
Tacklers are not as tanky as command fighters, nor do they have the brute firepower of gunships. But a well-played tackler is probably the best anti-interceptor ship out there, and can freely slap on resistance reductions for consistent damage. For those who are obsessed with ships that can cloak, the tackler also offers the best cloak in the entire game.
Role
The tackler’s main role is to speed up kills: speed debuffs reduce the enemy’s ability to escape, and resistance debuffs increase all damage dealt towards the target. Because of the focus on speed debuffing, tacklers are hence advertised as anti-inty ships, even though they can pretty much assist in the killing of any ship. They’re also excellent for punishing ships that are out of position, snagging them and preventing them from escaping.
Modules
_ Quick Note on Tackler Debuffs: Targeting, Sustaining, and Breaking _
All tackler debuffs require line of sight to trigger and sustain. Apart from using asteroids to break the debuff beams, cloaking will break the debuffs as well. For some obscure reason, ECM’s metastable field doesn’t break the debuff, but debuffs will fail against ECMs with the field active. Also, breaking lock doesn’t break your tackler debuffs either, so you can lock one enemy, put on TP/IB, then lock on to another enemy and apply the other debuff.
Also do note that you can’t stack multiple instances of the same tackler debuff, regardless of the module strength (i.e. you cannot overwrite a weaker TP with a stronger TP). A target that is already TPed/IBed cannot be TPed or IBed a second time, so watch the debuff beams and quickly apply your own debuffs if the enemy breaks your ally’s debuffs by ducking behind cover.
Tackler Modules
 Tackler Special Module: ODG "Chameleon"
Renders the tackler completely invisible for 18s, or until you use a module or weapon. Incoming damage (including the ongoing damage from covops’ Plasma Web) also interrupts the cloak. Recon’s spy drones and micro locator also prevents you from activating your cloak, and the latter interrupts your cloak if you enter its scan range. Do note that when you activate Chameleon, all your debuffs stop working.
After cloaking, don’t keep flying in the same direction; your opponent may continue to shoot at you and hope to reveal you. You have a 2s window upon cloaking where damage will not decloak you. So you could activate cloak even when affected by Plasma Web or Pulsar, as long as the remaining duration doesn’t last more than 2s (look out for the timer on the Plasma Web or Pulsar debuff icon on the top of the screen). But any visible effects (e.g. pulses from Pulsar) will still point out your location to the enemy, even if they cannot see you or lock on to you. Collision damage ignores the 2s window, so don’t crash into anything.
As of the 0.11.3 patch, Chameleon also offers a 20% damage boost for 5 seconds after it deactivates. The devs have stated that it is a way to encourage aggressive play using Chameleon. The duration is very short, and probably good enough only for a couple of shots if you use singularities or charged gauss shots. Still, that’s an appreciable damage boost.
In all honesty, this is nowhere near the best of the special modules, but it does have its uses. Against ships that cannot reveal your location or prevent you from cloaking (which is pretty much every ship, sans recon and covops and a guard with pulsar), this is your get-out-of-jail-free card. Apart from cloaking to escape, you can also cloak and move into a favourable position to attack the enemy (or ambush a lone LRF, if your loadout is suitable). Lastly, you can also cloak in the middle of a dogfight, break lock and tail your enemy for a short while (and maybe wait out the duration of buffs like the gunship’s Overdrive), then unleash hell when he or she thinks you’ve fled.
 Target Painter (T1 and up)
TP is the tackler module: no tackler should be without it, period. It drops the enemy’s resistance slightly, making it the ideal module in ganking. It has next to no cooldown (1s), so use it at every opportunity. Medium range, and drains quite a fair bit of energy while it’s active. When active, the icon glows slightly; ‘use’ it again to toggle it off.
Do note that command fighters’ diffusion shield is immune to TP, or any effect that alters resistances. It has zero resistances though, so fret not.
 Engine Suppressor (T1 and up)
The odd one out of the tackler debuffs, this is the only one that has a significant cooldown, a limited duration, and no energy cost to sustain (just a one-time energy cost to activate). Upon activation, the target is slowed down dramatically (41.9 to 53%) for 10s. Use it when you keep missing the target, or if you need to delay the target (e.g. bomb carrier making a beeline for your beacon, enemy trying to escape). The ultimate speed debuff, but you might want to consider dropping it for Inhibitor Beam if you prefer something more consistent (though weaker). Same range as TP.
 Inhibitor Beam (T3 and up)
IB functions the same way TP does, but with a different effect. Personally I lean towards IB as compared to ES, but that’s just a personal preference. IB has a much lower energy cost and a far longer range than TP and ES, so if you want to be a xxxxxxx and farm debuff assists, you could do so with IB. IB prevents your target from afterburning forwards (strafing remains unaffected). At first glance it doesn’t seem like a strong effect, since afterburning only increases a ship’s forward speed by 20% of its normal max speed, but it is nonetheless a valuable tool. In T3 and above, IB will prevent adaptive shields from working, so that is a major plus point. When active, the icon glows slightly; ‘use’ it again to toggle it off.

 Sentry Drone (T2 and up) and Heavy Guard Drone (T3, T4)
The only tackler module that isn’t a debuff. Upon activation, the tackler drops a stationary drone that deals decent thermal damage to an enemy that flies within 2k distance of it. Usually dropped in places where the enemy is too distracted to notice or destroy it, and end up taking hits from it (e.g. beacons). The damage can be rather appreciable if the drone is left alone. The drone used to drain energy while it was active, but now it only has a one-time energy cost.
Like Chameleon, this is another module that can be used creatively. You can also sneakily drop it in the middle of a dogfight for free hits against your enemy (he or she is unlikely to have time to shoot down the drone).
The Heavy Guard Drone (T3, T4) has twice the range and damage as compared to the normal sentry drone, but due to its slow projectile speed, it is geared towards countering slow and heavy ships. It also deals EM damage, unlike the standard sentry drone. For some reason, there isn’t a T5 version available.
Other Active Modules
I recommend equipping either shield booster or repair kit, or both if you can afford to the moment you get your fourth active mod slot (and round off your active modules with TP and IB). Tacklers come from the two more fragile factions, so survivability will be an issue. Self-heals allow you to escape by cloaking, then return to the fray quickly after healing up, so you don’t need to run around looking for an engie to heal you.
Main Weapons
If you follow the serving suggestion (i.e. tacklers are supposed to kill inties), you’ll be looking out for accuracy or alpha damage.
Assault Rails (T1 and up)
The basic fighter weapon. Versatile, medium range, high rate of fire, good accuracy, good damage. Come T3 you could run it with vanadium shells/iridum heatsink for a hail of bullets.
Gauss Cannon (T2 and up)
High accuracy, good alpha strike capabilities, and nice range. The preferred tool of the gauss sniper: sit back and murder intys with precise charged shots. The fact that uranium shells (T3 and up) drop your damage hurts quite a bit, so you might consider shaped charge shells instead for the crit chance boost. Stick to killing intys and maybe fighters; frigates are too tanky for the gauss to take down easily without your allies providing the much needed extra damage. Due to the low rate of fire, make your shots count: you can go for crit builds as charged shots have a higher crit chance. The damage output is on the low side, so take note.
Singularity Cannon (T2 and up)
Great alpha strike capabilities, slow and huge bullets, short engagement range (due to the slow bullets). I wouldn’t recommend them for T2, since the projectile speed is very, very bad. Come T3, it becomes a lot more brutal since you have new ammunition to play with. Melts anything in its path (which is a big path, considering the projectile size). As with the gauss, make your shots count; you can work towards brute damage with pulse dischargers. Take note that you will be in melee combat if you use singularities, so remember to fit your tackler for dogfighting (e.g. stack rotation speed). The heating and cooling rate is very poor, so take note.
Ion Emitter (T2 and up)
Reduces the target’s resistance to your main weapon by a hell lot as long as you keep the beam on the target; this effect does stack with TP. Ion tacklers are a different breed altogether: intys are agile and it’s not that easy to stay on target, plus they don’t have much health for you to make full use of its resistance dropping mechanics. (Furthermore, if your aim is that good, you should be using the gravi-beamer.) Hence ion tacklers are likely to be fighter and frigate killers.
Gravi-Beamer (T3 and up; tackler special weapon)
The tackler-only gravi-beamer is, IMO, the premier tackler weapon due to its additional effect. If you can get this weapon to work, that is (i.e. your aim needs to be good). Slows down the target by up to 41.2% as long as you keep the beam on target, which should become progressively easier since your target is being slowed down more and more. The slowdown is applied during the damage ticks. It has excellent range as well: the baseline range is just slightly higher than that of TP, and even when buffed up its range will still be comparable to IB’s range. If you use this, consider dropping ES. Worry not about its thermal damage; the damage is appreciable and you shouldn’t take that long to kill your targets, even frigates. Use it to snag intys, or even to prevent overexposed frigates from retreating to safety.
The slowdown effect wears off after 1.3s if the beam is no longer focused on the target. But before the effect wears off, you can sustain the effect by bringing the beam back on target before the effect completely wears off.
If you prefer damage over slowdown, look elsewhere for more versatile or specialized ways to deal damage.
Missiles
Standard Missiles (T1 and up)
If you’re in T1, you don’t have a choice. Otherwise, look elsewhere.
EM Missiles (T2 and up)
Slower than standard missiles, but with much better turn rates. I’ll recommend this for its greater agility.
Slowing Field Missiles (T2 and up; tackler special missile)
Identical to EM missiles, except for two differences: this deals slightly lower damage, and creates a spherical slowing field with a 1000 distance radius that drops the speed of all ships (allies and enemies alike) by 24.5%. IMO, avoid if you’re running adaptive shields with a close-range build, since you’ll end up running into your own slowing field and disabling your adaptive shields. Don’t launch these things indiscriminately as well: there’s a high chance you’ll irritate your allies with the slowing field (especially those who fly speedy ships), so use them judiciously. (And don’t ever farm debuff assists with these things, efficient as they might be.)
Kinetic Missiles (T3 and up)
Identical to standard missiles except for the different damage type. Good for finishing off enemies, since hulls have a lower default kinetic resistance. The reduced agility when compared to EM missiles could hurt if you’re up against agile opponents (which will happen a lot). If you use the gravi-beamer, you will tend towards kinetic missiles if your missiles don’t miss much. Otherwise, stick to EM missiles if you need that extra turn rate.
Ship Modifiers
Tacklers are fragile ships, so look out for modifiers that increase your survivability and effectiveness (so you can get the job done more quickly and escape). Energy management is also key: you may be afterburning while using TP and IB at the same time, and the tacklers’ reduced afterburner energy usage can only help you that much.
Hull
- Reinforced Beams (T1 and up): More hull strength, for the Fed tackler pilots out there.
- Reactive Armour (T2 and up): Patches your hull’s resistance hole against kinetic damage.
- Passive Armour (T3 and up): If you fly Jeri tacklers, you have pretty much no hull to speak of, so dropping your hull resistances won’t hurt that much. Might as well go with more energy if you really need it.
- I wouldn’t recommend galvanized or armour-plated hulls simply because of the mobility reduction. You’re going up against agile ships; don’t weigh yourself down.
Shield
- Auxiliary Shield Projector (T1 and up): More shield strength.
- EM Diffuser (T2 and up): Patches your resistance hole, but for your shields this time round. If you’re paranoid about thermal damage instead, consider Thermal Modulator (also T2 and up). Check out the log analyzers (links at the bottom of this post) to see what kind of damage you’ve been taking.
- Adaptive Shield (T3 and up): Useful for short-ranged builds that focus on pursuing enemies; buffs your shield resistance only when you are moving at 110% of your base speed, and you can actually benefit from this effect while afterburning and strafing. If you use longer ranged builds, or of you don’t fly around at max speed that much, adaptive shield is less important for you. Slowing field missiles also interfere with adaptive shields. As of v1.01, adaptive shield no longer buffs your hull resistance, making this module a lot less powerful. Still, most tacklers have a decent amount of shields, so it might be worth a look still.
Engine
- Vernier Engines (T2 and up): Rotation speed is critical in dogfights, so if you’re getting into them often, consider it mandatory. If you run a sniper build, look elsewhere.
- Catalyst Injector/Auxiliary Generator (T2 and up): If you need more speed, for any reasons, look here. The former improves your base speed slightly, and the latter gives a bigger boost to your afterburning speed. Watch out for the additional energy cost that auxiliary generator imposes.
- Cruise Engine Modification (T3, T4): Geared towards Invasion mode, this grants a huge boost to speed and an even larger one to your afterburning speed, but drastically reduces the handling. For Fed tacklers, one of them would bring your base speed to around 400 and your afterburning speed to over 600. I don’t know why anyone would want this. If you want to fly something fast, pick up an inty.
Capacitor
- Voltage Regulator (T1 and up): Straight-up increase in energy regen speed. T2 tends to be plagued with energy problems: you have more modules to use, and they all require energy.
- Pulse Discharger (T2 and up): Straight-up damage increase, but watch the reduced energy regen.
- Iridium Heatsink (T3 and up): Increases your rate of fire (and also makes your weapons heat up faster). If you’re running assault rails, you could consider this.
- Emergency Barrier (T2 and up): Makes you invulnerable for 1s when your hull reaches critical levels, and takes a long while to recharge. Tacklers are fragile, but not that fragile; know when to fall back and when you can press on. I wouldn’t really recommend this unless you have nothing more useful to equip.
CPU
- Overclocked CPU (T1 and up): Reduces target locking time. All your debuffs need to you lock on to your target.
- Enhanced Scanner (T1 and up): Improves scan range and gives an almost non-existent boost to crit rate. IMO not that useful: if you’re ganking from range, your enemies will be within your allies’ scan range, and if you run a short-ranged build the basic scan range should be ample. If you’re scouting around alone a lot, you might want to pick it up.
- Proton Wall (T2 and up): Reduces control-inhibiting effect duration. If you’re having ECM problems, you can consider this. It’s a nice module to have in T2, but that’s mainly because there aren’t that many CPU modules to choose from. But once you hit T3 I find that there are more useful modules you can equip.
- “Horizon” Module (T3 and up): The only way to improve your range if you don’t use thermal weapons. And range is good for sniping from safety. Look elsewhere if you thrive on close-range dogfights.
- Infrared Scanner (T3 and up): Crit chance increase is always sweet for any ship that focuses on killing.
Implants
Implants affect all your ships, so pick wisely and don’t be afraid of picking a poorer implant if it benefits the rest of your lineup more.
R1: Hull
Empire: Increase hull strength by 25%
Federation: Reduce explosion and crit damage against hull by 15%
Jericho: Increase hull resistance to all damage by 25 pts
Stick with J1 for lower tiers, consider F1 Armadillo for T3 and above if you’re taking a lot of crit and explosion damage. T3 introduces a lot more ways to improve crit damage, as well as a whole range of explosive weapons that you should watch out for.
R2: CPU
Empire: Reduce locking time by 43%, increase crit chance by 10%
Federation: Increase sensor range by 75%, and maximum and optimal weapon range by 20%
Jericho: Reduce incoming control-inhibiting effect duration by 23%, reduce main weapon spread by 20%
I like E2 Oculus for its improved locking speed and the crit chance boost. F2 Albatross is good for ranged builds or if you like to scout for enemies. Tacklers shouldn’t have weapon spread issues, so the only draw for J2 is the anti-ECM protection.
R3: Shields
Empire: Increase shield regen by 30%
Federation: Increase shield volume by 25%
Jericho: Increase shield resistance to all damage by 20 pts
IMO J3 wins hands down because of the resistance bonus. You don’t have that much brute shield strength to benefit from F3, and E3 is just bad.
R4: Missiles
Empire: Increase missile damage by 10%
Federation: Increase missile velocity and turn speed by 20%
Jericho: Increase max missile range by 75%
E4 gives you damage, F4 gives you accuracy. J4 is for other purposes (e.g. trolling enemy LRFs with EM torps).
R5: Engines
Empire: Increase ship rotation by 30%
Federation: Increase strafe speed by 75%
Jericho: Increase max speed by 3%
I recommend E5 for its rotation bonuses, but pick up F5 if you need the strafe bonus for the rest of your lineup; you can always compensate with vernier engines. J5 is meh.
R6: Main Weapon
Empire: Increase main weapon damage by 7%
Federation: Increase crit damage by 30%
Jericho: Increase EM and kinetic projectile speed by 30%, increase thermal heating time by 10%
Singularity and gauss users will appreciate J6 for the projectile speed boost it provides, and gravi-beamer users may also like the increased heating time. F6 Ox is a key piece in crit builds. You can’t really go wrong with E6; pick it up if you don’t have any intentions to run crit builds and have no problems with projectile speeds (likely gravi-beamer users).
R7: Energy
Empire: Increase capacitor volume by 40%
Federation: Reduce afterburner energy use by 17%
Jericho: 15% of received damage restores energy reserves; does not reduce incoming damage
Stay with F7; you won’t go wrong with it.
R8: Multipurpose Module
Empire: Multipurpose module cooldown reduced by 17%
Federation: Upon using multipurpose module, ship is immune to engine-inhibiting effects for 5s
Jericho: Upon using multipurpose module, ship is immune to energy draining effects for 15s
F8 is your other get-out-of-jail-free card and your defense against speed debuffs. You’re fragile and depend on speed as your tank; you can’t go wrong with F8.
R9: Faction Traits
Empire: Increase shield and hull resistance to all damage by 12 pts for every enemy locking on to you
Federation: Increase max afterburner speed by 7%
Jericho: Increase shield resistance to all damage by 10 pts; shield can absorb collision damage
E9 Gigas II wins hands down: the shield and hull resistance will benefit every ship in your lineup.
Basic Tips and Tricks
Highly Visible Debuff Beams
Debuff beams are highly visible. Your target may start to take evasive manoeuvres the moment you slap on the debuffs. For stealthy approaches, delay your debuff application. Time your debuffs so they kick in right before your attacks land (you can launch missiles/singularities first before the debuffs).
If you’re not that experienced in dogfights, the debuff beams also immediately tell you where your enemy is.
In team play, the debuff beam also tells the whole team which enemy is being snared; an enemy that is slowed and has its defenses lowered is a tasty target to gang up upon.
Chameleon: Hide and Wait
Chameleon can help protect you while you wait for enemy buffs to wear off; most of them lasts for over 10s, but Chameleon lasts for 18s. You can cloak and evade:
- Covops: Orion (this one only lasts for 5s)
- Gunship: Overdrive, Aiming Overcharge
- Command: Diffusion Shield, Valkyrie
Furthermore, once Chameleon wears off (or when you cancel it), you even get a damage boost, so if you cloak to escape, then stalk your enemy, you can ambush him or her and enjoy the damage boost.
Tacklers in T1
Tacklers are pretty much the best fighters in T1 due to the sustained damage boost (TP) and their ability to cloak (which helps you survive dogfights against other fighters). Recons can tag you with spy drones, but the lack of the micro locator means you can’t be decloaked once you activate Chameleon. Tacklers become noticeably weaker in T2 due to the increased strength of other ships, so don’t fret if your tackler suddenly feels a lot more useless. Fly cautiously: you’re not a frontline ship. You’re supposed to make quick hit-and-run attacks, or snipe from afar. Fight with your allies and let them distract the enemy, not take on the enemy alone (unless you’re very confident of winning).
Anti-Interceptor Play
Tacklers kill intys by slowing them down so they can’t run (i.e. removing their main source of survivability), and killing them with high damage (TP). Although intys are generally fragile, it’s unlikely that you can take them down in an instant, so it’s always advisable to engage distracted targets (intys that are attacking someone else, or going after an objective). If they’re not actively out to kill you, they’re a lot easier to manage.
Covops Defenses
The king of burst damage has a couple of toys that are hard counters against you.
- Plasma Web (T1 and up): Deals ongoing damage, damage ticks can decloak you. If you get hit, you can’t cloak and run. Pop your self-heals if you can’t tank the damage and flee if you need to. 2k range, lasts for 10s. Sucks when you’re tagged by it; you’ll need to perform evasive manoeuvres without cloaking if you must flee, or you’ll be killed quickly by Orion. Q/E jinking (check out xKostyan’s video) can help you avoid getting hit while you flee.
- “White Noise” Jammer (T3 and up): Prevents you from locking on to targets for a short while. You need to lock on to your enemies to be effective. Mk3 versions have 2.8k range, which means it’s may be hard to stay out of range of it.
- Adaptive Camo (T2 and up) allows the covops to escape unharmed. Pursue if you’re confident, because odds are the covops will be prepared to face you if you give chase. Don’t pop your ES too early because Adaptive Camo breaks it, and ES will go on cooldown while the covops turns around and counterattacks.
Recon Defenses
Recons can make life miserable for you if you need to cloak and flee. IMO one of the better ships for tackler hunting.
- Spy Drones (T1 and up): Prevents you from cloaking and cuts your regen. A good dogfighter can chip away at you while you struggle to keep up with its superior agility. If you need to flee, try to bump something and shake off the drones, then run. (Notice how anti-cloak can make things difficult for you? Learning how to escape without cloaking is critical.)
- Micro Locator (T2 and up): You can’t do anything if the recon chooses to deploy ML right after you cloak. Adopt evasive manoeuvres that don’t rely on cloaking. Do note that it has a very large scan range, reaching almost 3k in radius, so it may outrange your weapons (e.g. singularities/assault rails). Thankfully, ML requires line of sight in order to detect you, so you can hide behind asteroids and other kinds of cover to avoid being revealed by it.
- Parasitic Remodulator (T2 and up): All tacklers have a decent amount of shields, so this will hurt no matter what you fly. Your best defense is not to be targeted by it in the first place; attack only if the recon is distracted. If it came specifically after you, evade or lure it to your allies. You can cloak and escape from it, provided you’re not tagged by spy drones or if there isn’t a ML close by.
- Phase Modulator (T2 and up): A 5s total cloak. As with Adaptive Camo, if you have ES, try not to use it too early because PM will break it; you can apply ES after PM runs out, then kill the recon quickly.
- Proximity Mines (T2 and up): Deals thermal damage, and hurts like hell. Watch out for little blinking red lights. A good recon pilot can drop this right on top of you.
Also note that a recon using microwarp moves forward in a straight line before it launches rapidly forwards. This is one of the best times to kill a recon, because it can’t fight back at all.
ECM Defenses
ECMs are the kings of debuff, and there’s pretty much no way out once you’re stunned. ECM debuffs have 2.8k range at Mk3 (3.1k at Mk4), so there’s a high chance they will stun you if they’re out to kill you. As with all intys, engage those that are distracted. Do note that ECMs are also the toughest inties as they have the most health. The nicest thing they can do to you is to snag you with Weapon System Inhibitor (T2 and up). The worst case scenario is to be zapped by Stasis Generator (T3 and up), then murdered by another enemy with high damage. More often than not, you’ll be zapped by Ion Diffuser (T1 and up), then have your energy drained so you can’t use your modules or afterburn for an extended period of time. ECMs may have the lowest damage potential out of all the intys, but never underestimate their power still. They are still agile and capable of taking you down in a dogfight. At least, you can safely cloak and escape from them (provided you’re not stunned or have your energy completely drained).
- Ion Diffuser (T1 and up): No way around this once you get zapped. While you can’t shoot or use modules (this breaks your debuffs too), you can still fly around. Evade the enemy and wait till the effect wears off.
- Energy Absorber (T2 and up): In the rare occasion where you only have your energy sapped, you can cloak and break the effect. This debuff also requires line of sight, so you can break it by going behind cover.
- Weapon System Inhibiter (T2 and up): Same line-of-sight requirement, cooldown and range as TP, so you can expect to be snared almost permanently. Drops your weapon damage, but at least you can shoot, fly and use modules.
- Stasis Generator (T3 and up): As with Ion Diffuser, there’s no way around this either, and you can’t even move. Cross your fingers and pray.
Metastable Energy Field is a double-edged sword: it’s probably one of the best times to kill an ECM. MEF lasts for 6s; wait for the field to turn purple and expand (watch the top left corner of your screen, where you can see your locked target more clearly) before launching your missiles and releasing your charged shots/singularity balls. You’ll be stunned if you’re in range, but your attacks would be en route to the stationary ECM.
Other Resources
This is where I shamelessly steal stuff that others have posted. I will continue to update this with more resources.
Log Analyzer
Helps you check almost anything that happens in a fight. You’ll be interested in seeing how much damage you’ve taken to plan your defensive modules and implants accordingly. Check out [Snib’s analyzer](< base_url >/index.php?/topic/21314-snibs-star-conflict-log-analyzer/) and [Eta’s online analyzer](< base_url >/index.php?/topic/22926-etas-star-conflict-web-log-analyzer/).
Developer’s Blog: Resistances
Check out [this thread](< base_url >/index.php?/topic/20483-developers-blog-from-july-10th-damage-resistance/) for information on resistance values and damage reductions. Pair it with the log analyzers to determine the best resistance and shield/hull strength modules to equip.
Guide: True Value of Resistances
A [comprehensive guide](< base_url >/index.php?/topic/24645-true-value-of-resistance/) on resistances and HP by xKostyan.
Videos
xKostyan has a couple of videos on Bear and Parallax play [here](< base_url >/index.php?/topic/23166-video-xkostyan/?p=266120), and some SecCon Lion MkII videos [here](< base_url >/index.php?/topic/23166-video-xkostyan/?p=266716).
yeahalex has a [video](< base_url >/index.php?/topic/23829-gunship-intermediate-level-guide-for-federation-gunships/?p=276387) about Federation gunships using singularities. Good for learning about how to dogfight, for those inclined towards close-range combat.
AimBooster
You can work on your aiming skills with this online AimBooster. It features a variety of modes (including a custom mode) that should be more than enough for your training needs.

