Well, as per a previous thread - do note that some information is unconfirmed or incomplete. If you know a point is incorrect then please quote the point with the correction. Let’s begin.
This guide will feature a comprehensive breakdown of:
- Scaling mechanics
- Spawnable modifiers
- Enemy groups
- All CURRENTLY KNOWN mechanics of the Experimental Destroyer
- Methods to kill Destroyers
To begin, there are three groups of Pirate Destroyers of varying difficulty which each have different reward restrictions.
Low Difficulty
- Pirate Destroyer ‘Adventure’
- Pirate Destroyer ‘Fortune’
- Pirate Destroyer ‘Revenge’
High Difficulty
- Cartel Destroyer ‘Happy’
- Corsair Destroyer ‘Pearl’
- Enclave Destroyer ‘Golden Hind’
Special
- ‘Experimental Destroyer’
Let’s break down what each Destroyer uses and some problems.
Pirate Destroyers only spawn in certain sectors and can only be found outside of these sectors inside of bugged instances.
Sectors currently able to spawn Pirate Destroyers include
- Felony Border
- Dreamland
- Captain Kidd’s anchorage
- Northern berth
- Spyglass
- Foul ground
- Stockade
- Skeleton island
- Derelict Stronghold
- Northern Mining Station
- Pilgrim-11
- The Source
- Sanctuary
- Ancient Ruins
- Abandoned Complex
The Experimental Destroyer can ONLY be found inside of Dreamland.
All Pirate Destroyers share several mechanics along with a passive “particle flow disruptor” effect (higher range = less damage).
- Scaling health pool
When attacked by a player for the first time, the Destroyer will stop moving and commence “aggression”.
Upon being attacked by a second player while the first player has not stopped attacking, it’s hull and shield will double.
This continues until (I think) seven players have targetted the Destroyer.
If a player causes the Destroyer to scale but leaves, the Destroyer will scale back down.
- Shield regeneration
If a player dies while fighting a Pirate Destroyer and there are no other attackers - the shield of the Destroyer will begin to regenerate aggressively. This stops the moment the Destroyer is attacked again.
- Modifiers
Upon spawning, a Destroyer will receive (2) buffs from a list. These buffs will either affect the Destroyer or the allies it spawns at various shield or hull percents.
You can tell what buffs the Destroyer has received upon spawning by checking the ingame chat when it spawned.

These modifiers include:
- Recovery from the ashes
- Any deaths significantly heal the Destroyer (includes holograms, drones, objects).
- Increased speed
- Ship speed is increased by 50%?.
- Thermal Nebula
- The ship will spawn a thermal cloud on a selected target, dealing 5000 damage every 0.5 seconds for 3 seconds.
- Shield Gatherer
- The ship will periodically drain 3,500 shield points every second for 3 seconds.
- Thermal Charges
- Upon taking (?) damage, the ship will drain 3,500 shield points every second for 3 seconds.
- Increased EM shield resistance
- Ship EM shield resistance is significantly increased.
- Increased Kinetic shield resistance
- Ship Kinetic shield resistance is significantly increased.
- Increased Thermal shield resistance
- Ship Thermal shield resistance is significantly increased.
- Ally boost
- Significantly more allies are spawned at an increased amount of hull and shield percents.
- Module reloading
- Ship module reloading speed is significantly increased
- Ally module reloading
- Allied ship’s module reloading speed is increased by 42.9%
- Ally weapon boost
- Allied ship’s deal increased damage
- Raider Portals
Upon the death of the Destroyer and any attackers or loss of aggro, all spawned allied ships will spawn a ‘Raider Portal’ and will leave within a couple of seconds. It is possible to stop them from leaving by hitting them before they leave.

Adventure uses the model of a “Brave” Empire Destroyer.
It uses Coil Mortars, a Pyro Emitter with no module model, Repelling beam and “Unidentified Module” with Heavy Repair Drones.
When breaking line of sight with the Destroyer it will begin spawning “pulsars” on every enemy in a high range every 0.5 seconds that deals less damage over time. Pulsars will stop spawning when the player approaches the Destroyer again or destroys the Unidentified Module.
Adventure currently cannot spawn as it is programmed to spawn only in sectors not owned by:
- The Encalve
- Jericho
- Empire
- Federation
So unless a Sector is temporarily between owners it is impossible to see the ‘Adventure’.
As a Low Difficulty Destroyer, Adventure will only drop:
- 1 seed chip container
- 2 intact containers
- Low chance for a ‘Tornado system overcharge 17’
- 600,000 credits
Low difficulty destroyers can only drop special seed chips up to the rank of 11 and exceptional seed chips up to the rank of 13.
Seed chip containers are protected drops, so any participants in the kill can pick them up.
During the fight, Adventure will fire coil mortars continuously until overheat at the player - these Coil Mortars are able to be blocked by ‘Missile Shield’ and barriers such as Static Barrier and Hammerhead’s mobile barrier.
Due to Coil Mortar being a sequential weapon, the fire rate increases the more turrets are able to fire - so staying directly behind or below the Destroyer will significantly reduce damage taken.
If the player is in line of sight of the Repelling Beam module, the Destroyer will use it the moment it is off cooldown and when the player is within range - keep this in mind or use explosive weapons to destroy the Destroyers modules as quickly as possible to avoid being thrown in nearby objects.
Do note that Adventure’s pyro emitter cannot be killed as it has no model - you will be able to see what side of the ship it is on by checking for an empty module mount.
As Adventure does not currently spawn, this demonstration is fairly old and does not show how to deal with the Destroyer without a Waz’dum
Demonstration:


Fortune uses the model of a “Sibyl” Jericho Destroyer.
It uses a low projectile speed Fuse Blaster, a Gravitational lens with no module model, Hybrid Missile and Plasma Turret with Static Shields.
When breaking line of sight with the Destroyer it will spawn “pulsars” on every enemy in a high range every 0.5 seconds that deal reduced damage over time. Pulsars will stop spawning upon re-engaging the Destroyer or killing it.
Fortune currently spawns in most eligible sectors with only a select few unable to spawn the Destroyer.
Currently it cannot spawn in:
- Sanctuary
- Abandoned Complex
- The Source
- Ancient Ruins
As a Low Difficulty Destroyer, Fortune will only drop:
- 1 seed chip container
- 2 intact containers
- Low chance for a ‘Tornado system overcharge 17’
- 600,000 credits
Low difficulty destroyers can only drop special seed chips up to the rank of 11 and exceptional seed chips up to the rank of 13.
Seed chip containers are protected drops, so any participants in the kill can pick them up.
Fortune is one of the more challenging of the two low difficulty destroyers able to spawn, as it uses it’s gravitational lens and hybrid missile constantly and frequently spawns with extremely difficult to deal with allies.
I would advise when fighting this ship to kill the plasma turret as soon as possible as it uses the same module as the ‘Experimental Destroyer’ - meaning that it takes a significant amount of hull damage upon module death due to it’s significantly lower total hull pool. Otherwise, it is possible to circle strafe to dodge the slow projectiles of the Fuse Blaster while eliminating any troublesome allies of the ship.
Demonstration:


Revenge uses an “Antares” Federation destroyer model.
It uses a Coilgun, Blaster Turret, Tactical Shielding and “Unidentified Module” with Static Shields.
When breaking line of sight with the Destroyer it will begin spawning “pulsars” on every enemy in a high range every 0.5 seconds that deals less damage over time. Pulsars will stop spawning when the player approaches the Destroyer again or destroys the Unidentified Module.
Revenge can spawn in any eligible sector with no restrictions.
Revenge is the easiest Pirate Destroyer to kill due to it’s low health pool and low damage output. The ship always spawns with a “Recovery from the ashes” built in, meaning it will regenerate aggressively from any killed attackers but has such a low health pool that it can realistically be killed without seed chips.
As a Low Difficulty Destroyer, Revenge will only drop:
- 1 seed chip container
- 2 intact containers
- Low chance for a ‘Tornado system overcharge 17’
- 600,000 credits
Low difficulty destroyers can only drop special seed chips up to the rank of 11 and exceptional seed chips up to the rank of 13.
Seed chip containers are protected drops, so any participants in the kill can pick them up.
Demonstration:


Happy uses a “Sibyl” Jericho Destroyer model.
It uses a G’thar’du Cannon, Tempest Launcher, Destabilising Field, modified “Remote Mine Layer” and Unidentified Module with Static Shields.
When breaking line of sight with the Destroyer it will begin spawning “pulsars” on every enemy in a high range every 0.5 seconds that deals less damage over time. Pulsars will stop spawning when the player approaches the Destroyer again or destroys the Unidentified Module.
Happy can spawn in most eligible sectors but will not spawn in Sanctuary.
Despite being the easiest of the higher difficulty destroyers, happy is a test of target priority, module management and positioning. When at moderate to high ranges Happy will use it’s Tempest launcher and Destabilising Field if they are off cooldown and within line of sight an aggressor. Although there is little you can do to avoid the Tempest launcher other than move out of the way of the unguided rockets, Destabilising Field’s debuff can be prevented by reducing total speed to under 35% which in doing so will remove the debuff entirely.
Throuhout the fight Happy will spawn large green fields that deal small amounts of damage over time. If you do not move shortly after these fields spawn, it will prevent you from moving for a fairly long period of time or until you use a multipurpose module to break the slowdown effect.
The most effective setups to kill Happy utilise:
- High total hull/shields
- High regeneration
- High mobility
- Explosive weapons
If you are able to kill it’s modules as soon as you can engage then Happy is a relatively relaxed fight from range, although slow due to the passive damage reduction - but if you intend to play aggressively you will need to either keep on the move or out regenerate the damage dealt to you.
As a High Difficulty Destroyer, Happy will drop:
- 2 seed chip containers
- 2 intact containers
- Low chance for a ‘Tornado system overcharge 17’
- 1,200,000 credits
High difficulty destroyers can drop special seed chips up to the rank of 17 and exceptional seed chips up to the rank of 13.
Seed chip containers are protected drops, so any participants in the kill can pick them up.
Demonstration:


Pearl uses an “Antares” ship model.
It uses Coil Mortars, Photon Emitter, Repelling Beam, Blaster turret and Unidentified Module with Static Shields.
When breaking line of sight with the Destroyer it will begin spawning “pulsars” on every enemy in a high range every 0.5 seconds that deals less damage over time. Pulsars will stop spawning when the player approaches the Destroyer again or destroys the Unidentified Module.
Pearl can spawn in any eligible system with no restrictions.
Pearl is the nastiest of the high difficulty Destroyers to fight, with it’s absurdly high range and damage output it can be difficult to approach let alone kill. As a result you will want to be adequately chipped and prepared if you want to take on a Pearl alone. Explosive weapons or high damage missiles are mandatory as Pearl’s repelling beam has a low cooldown and will frequently throw you far away from the Destroyer and in line of it’s Photon Emitter while bombarding you with Coil Mortars the entire time. Approaching the Destroyer from the underside, behind or while invisible are the best options for intial engagement as you will then have to destroy it’s modules within seconds of engaging or suddenly have the tables turned on you.
Waz’dum, Coil Mortars, Thermolauncher, Singularity Cannon or Le Claire are your best options for the base of your chips as all of them will allow you to strip away modules near instantly or in the case of Waz’dum out regenerate all damage the Pearl can dish out but any rapid fire explosive weapon can suffice.
Just beware when attempting to re-engage after a death, as Pearl has a range of roughly 6,000m which can make approaching the ship again difficult.
As a High Difficulty Destroyer, Pearl will drop:
- 2 seed chip containers
- 2 intact containers
- Low chance for a ‘Tornado system overcharge 17’
- 1,200,000 credits
High difficulty destroyers can drop special seed chips up to the rank of 17 and exceptional seed chips up to the rank of 13.
Seed chip containers are protected drops, so any participants in the kill can pick them up.
Demonstration:


Golden Hind uses a “Brave” Empire Destroyer model.
It uses Torch Launcher II, Tractor Beam, Tactical Shielding, Tactical Warp and Isotope Harvester with Heavy Repair Drones.
When breaking line of sight with the Destroyer, Golden Hind will teleport the target directly in front of it.
Golden Hind currently spawns in only a few sectors with the following being confirmed spawns:
Currently it can spawn in:
- Sanctuary
- Abandoned Complex
- The Source
- Ancient Ruins
- Northern Mining Station
- Pilgrim-11
- Derelict Stronghold
Golden Hind is the second hardest hitting Destroyer - sitting only behind the “Wood Louse” which is reputable to one shot player Destroyers constantly. Golden Hind will use tractor beam to pull in players from almost any range, as it will also frequently use it on players already in melee range. There is no way to stop the tractor beam other than breaking line of sight temporarily or invisibility. The ship will also attempt to use Isotope Harvester but it is barely mentionable due to the inflated hull and shield capacity of Pirate Destroyers.
However, attempting to fight Golden Hind in a Frigate or a Destroyer is extremely challenging. Thanks to the absurd damage of the Torch Launcher, Golden Hind is able to 2 shot most Frigates and in proximity can 1 shot Destroyers, so it is advised that if you opt to use a Destroyer while hunting that you keep out of melee range or risk being killed instantly. It is best to treat a Golden Hind like any player Destroyer and approach from behind or below to minimise damage intake. Due to it’s lack of offensive modules this is purely a damage race as even the regeneration from a Waz’dum will not stop Golden Hind from killing you if it spawns with Elite Scorchers or Increased damage.
As a High Difficulty Destroyer, Golden Hind will drop:
- 2 seed chip containers
- 2 intact containers
- Low chance for a ‘Tornado system overcharge 17’
- 1,200,000 credits
High difficulty destroyers can drop special seed chips up to the rank of 17 and exceptional seed chips up to the rank of 13.
Seed chip containers are protected drops, so any participants in the kill can pick them up.
Demonstration:

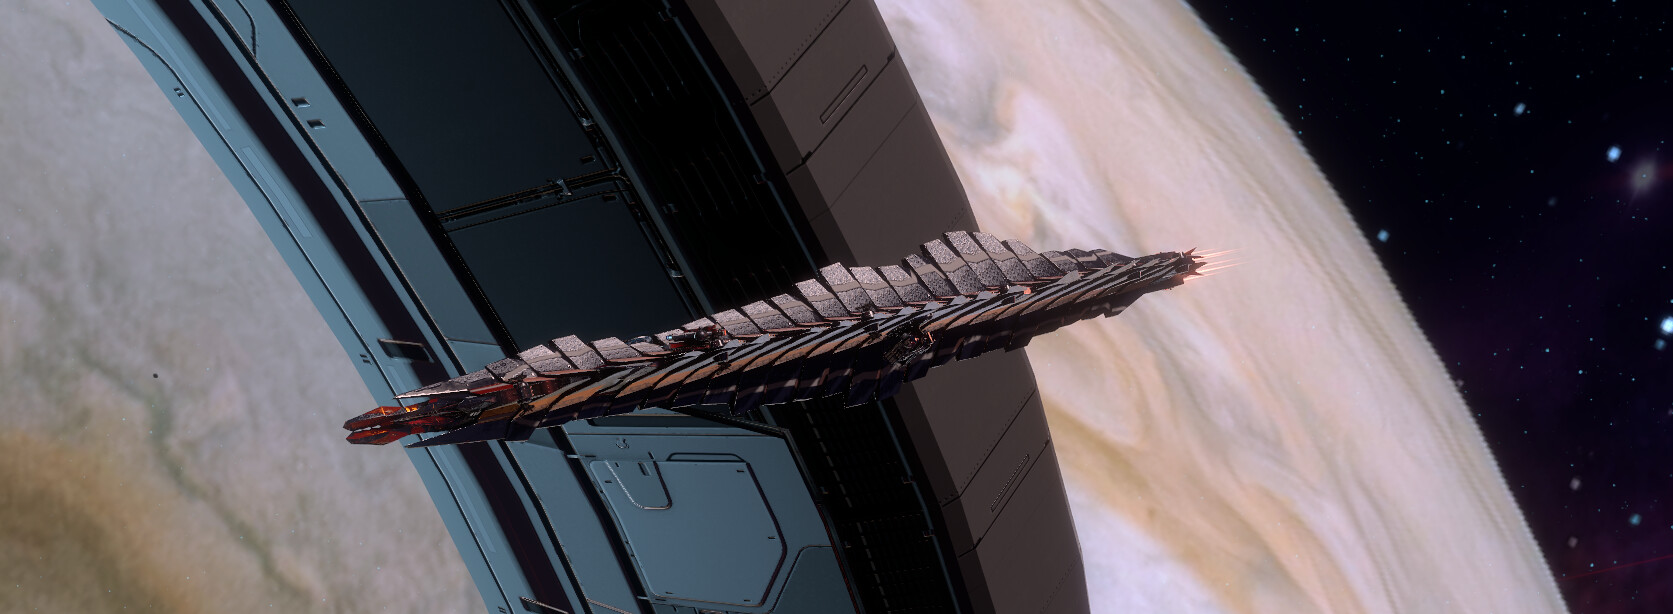
The Experimental Destroyer uses a unique model of a heavily modified ‘Custodian’ Jericho Frigate.
It uses Boson Cannon, Enclave Emitter, Tempest Launcher, Jump Drive and Plasma Turret with Heavy Repair Drones.
The Experimental Destroyer can only be found in the ‘Dreamland’ Sector. Be ready.
The Experimental Destroyer is the strongest PvE enemy in the game currently, with a base hull pool of 20,000,000 and shield of 4,000,000 with 400 resistance to every damage type - it is highly advised to kill enemies as they spawn as you will be struggling to out regenerate the damage dealt by it alone.
This Destroyer features several unique mechanics due to it’s unique modules and weapons.
Boson Cannon
This is only really a Boson cannon by name, as it fires an explosive projectile with ~7km range with a 750m explosion radius. Upon being hit by the Boson cannon you will receive a debuff which upon entering roughly a 1000m range of another target with the debuff will begin applying a damage over time varying based on range.
However, the Boson Cannon has a second hidden debuff. If the same debuff is applied to a Destroyer and the Destroyer is within proximity of another Destroyer, it will begin rapidly draining energy of both targets until they are no longer in proximity of each other.
The projectiles of this weapon can be shot down by missile shield.
Enclave Emitter
Upon activation the module will generate a drone ~100m in front of the Destroyer which will project a 10km beam dealing ~600 thermal damage per second for 3 seconds. After the initial beam it will project a 10km beam with roughly 1km width dealing high thermal damage and regenerating hull for any destroyed targets.
Being hit by this beam will kill you.
This module uses the Photon Emitter model and is located on the top of the ship next to the Jump Drive.
Tempest Launcher
Upon activation the module will fire 16 guided torpedoes at any enemies within 10km and 130 deg (no more than 2 torpedoes per target) dealing roughly 50,000 kinetic damage to regular ships and an additional 220,000 kinetic damage to Destroyer targets. These torpedoes can be destroyed by missile shield, explosive damage and damage over time effects.
All damage dealt by the module regenerates the hull of the Destroyer.
This module uses the Tempest Launcher model and is located on the botton of the ship next to the Plasma Turret.
Jump Drive
Whenever the module is off cooldown, the Experimental Destroyer will purge all debuffs, turn invisible and rapidly accelerate backwards - typically reaching up to 10km backwards.
This module uses the multiphase shield model and is located on the top of the ship next to the Enclave Emitter and has a roughly 36 second cooldown.
Plasma Turret
This is the same Plasma Turret found on the Fortune Destroyer and is surprisingly a standard plasma turret with a massively increased durability and damage on module death.
Debuff Purge
Upon receiving a push or pull debuff, the Destroyer will purge all debuffs temporarily.
This mechanic is shown by a ‘Green mist’ like effect surrounding the Destroyer for the duration of the debuff purge.
Waz’dum can be reapplied through the debuff purge.
Modules, weapons and effects that can cause the debuff purge include:
- Trap Mine
- Anchor Mine
- G’thar’du Launcher
- Gravitational Lens
- Tractor Beam
- Gravi Lasso
- Boarding Coil Mortar
- ‘Gravitational Anomaly’ seed chip effect
- ‘Static Charge’ seed chip effect

This is a server side buff and as a result cannot be prevented by destroying components of the Destroyer.
The Experimental Destroyer is the ultimate damage check currently for seed chips in PvE, with 400 resistance to all damage types it will take very little damage compared to if you were fighting a Golden Hind or Pearl.
As a result, a hull resistance debuff is almost required if you want to deal considerable damage as it will lower the damage reduction partially. Do note however that if you do use a Hull resistance debuff, this debuff will be purged if a push/pull effect is applied to the Destroyer - reducing damage output considerably.
Upon engaging with the Destroyer it is advised to immediately position yourself on the same side as the the Enclave Emitter and Jump Drive to avoid eating a Tempest Launcher directly to the face. It is vital while fighting the ship to remain on this side of the ship as much as possible as the Tempest Launcher will fire the moment it has a valid target, which will instantly trigger your emergency barrier without warning and then likely kill you as a result.
Do note that as a result of Star Conflict’s Ai being a little funky, the Experimental Destroyer may fire the Tempest Launcher directly through it’s hull at you, so be prepared to move at a moment’s notice if this happens.
After you have begun dealing damage the Destroyer will then use it’s Jump Drive. You cannot prevent this due to a debuff wipe as the module begins operation. Begin moving toward the Destroyer but move out of the way of the Enclave emitter as it will immediately trigger after a Jump Drive if you are:
- In front of the ship
- The module is off cooldown
If the Tempest launcher has not been triggered yet either, it will fire at the same time as the Enclave Emitter, so make sure you have your flares ready the moment you see the second Torpedo target you.
At various amounts of hull there are fixed spawn groups.
The first group consists of:
- 2 Enclave Destroyers
- 1 Wicked Chameleon
Enclave Destroyers use Custodians with the Protective Barrier 1.0 special module, Pulsar, Pursuit Algorithm and Plasmatrons. It is highly advised to kill them when possible without moving away from the safe side of the Experimental Destroyer as the Plasmatrons deal sigificant thermal damage. Do note that upon reaching ~80% hull, they will side boost away under Pursuit Algorithm and then approach you once more.
The Wicked Chameleon that spawns is a high health variant, meaning that it only has Stasis, Protocol Regulation and a cloak. Kill it when possible as the stasis may get you killed.
This group composition will only spawn once per kill, so the moment the Enclave Destroyers are dead, they will never spawn for the rest of the kill.
Other enemies of high priority include Elite Scorchers and low health vairant Wicked Chameleons - as both units will disrupt regeneration modules, leave you vulnerable to damage and disrupt active modules.
Elite Scorchers in particular need to be killed as soon as possible, even if it leaves you vulnerable to a Tempest, as their Hazardous Veils will completely deny all forms of regeneration - including Waz’dum - due to the Experimental Destroyers high damage resistances.
Overall, this is not a fight advised to be taken on alone due to the high total hull and shield, damage resistances and damage output of the enemy Destroyer.
Make sure to have at least one Waz’dum with you if you are taking on the boss in a group and bring flares. The Tempest Launcher has enough range that even if you avoid it, it will come back for a second pass and attempt to hit you again.
Explosive weapons are advised as they deal severely increased damage to Destroyers, but use whatever you have access to that does the most damage and do not bring an Interceptor. You will die repeatedly if you do.
As a Special Enemy, the Experimental Destroyer will drop:
- 1 seed chip containers
- 2 intact containers
- Low chance for a ‘Tornado system overcharge 17’
- 2,500,000 credits
- 1 ‘Valuable Sample’ container
The Experimental Destroyer can drop special seed chips up to the rank of 17 and exceptional seed chips up to the rank of 13.
Seed chip containers are protected drops, so any participants in the kill can pick them up.
The Valuable Sample container has a ~5% chance to drop Cortical Columns required to produce Ze’ta components.
Demonstration:

Some common equipment used for Pirate Destroyer kills include:
- Waz’dum
- The weapon allows you to out-regenerate the damage output of almost all enemies
- Transparency effect seed chip
- This was what I used in the majority of demonstrations - a high level effect can grant you large damage windows before being forced to retreat
- EM scattering field
- When using a Long Range Frigate to make a kill, it is advised to always have this module and Reverse Thruster equipped to drift into proximity of the Destroyer, secure a burst of damage and then withdraw temporarily.
- Coil Mortar
- Decent rate of fire, explosive and decent base damage make the weapon a solid base for seed chips for killing Pirate Destroyers, as the explosive damage will kill all components of the Destroyer even outside of proximity with enough damage
- Dag’tnith Launcher
- Homing projectiles, explosive, high rate of fire and high base damage make this an even better base weapon for seed chips - it is only held back by the low projectile speed as it is possible to not have sensors when killing a Destroyer or engaging from moderate ranges
- Crystal Infiltrator
- If you are not the main damage source but have access to this module, it can sigificantly improve the total duration of the kill but requires you to be in a squad or wing with other participants to increase their damage.
- ‘Tracer’ Plasma gun
- This weapon provides an identical effect to Crystal Infiltrator but without a cooldown lockout in the event the debuff is purged. This is another alternative for assisting in a kill but also requires you to be in a squad or wing with any other participants.
The setup I personally use the most commonly is a Waz’dum or Proximity Mortar with maximum critical chance, high damage, moderate critical damage and high firerate with low Destroyer damage.
It is advised when trying to kill a higher difficulty pirate destroyer solo to take advantage of as many modifiers as possible.
For example - if you are using a Dag’tnith launcher you will want to take advantage of:
- Main weapon damage
- Critical damage
- EM damage
- Destroyer damage
- Hull or shield debuff
- High fire rate
- Melee Coefficient (< 1000m bonus damage)
Forcing your damage through the maximum amount of modifiers possible will ensure numbers begin to go ballistic upon beginning damage in a solo engagement.