I don’t fly around with aiming overcharge all the time, but the Dps is really decent and this TTC gives me more Alpha-Strike potencial for killing engineers etc. which is rly useful in a Gunship.
would be nice to see if you have a Pseudo-Gunship style build* for Frigs…
I personally enjoy using it to fend off intys or other frigs in self defense, but it could (in theory) be used offensively if it’s adapted to a guard or a really tanky frig.
*by this I mean high ROF with the ablity to also hold a long period of continuous fire.
it could (in theory) be used offensively if it’s adapted to a guard or a really tanky frig.
*by this I mean high ROF with the ablity to also hold a long period of continuous fire.
you can’t make a single frig to be maneuverable, tanky and with continuous fire at the same time.
continuous fire? black dragon with shared cooler, 2 times galv one plated and you have tanky lrf with great fire but with like no maneuverablility.
Inquisitor S can be really tanky and can also handle the continuous fire with coils OR HB.
There are only few ships you can make maneuverable with continuous fire. The closest you can get is some engie or guard in fed. T-rex for example. It can’t be that tanky tho. wait for the elrf secret project ship to come out or just simply build your octo. It won’t be as effective though.
Hi, OmegaFighter. Do you like Achilles? I want to see you build, pls.
I do not have the DEagle, so i use it as a simple Gauss Boat.
Nobody should discuss with me about that. It works for me very well. And should work very well for everybody with an overaverage aim. Yes it has 0 Synergy, since i used this on the Nukem just without the Emergency Barrier. But it’s the same just with adaptives etc.

I heard there is the new Flux Phaser around…
This works pretty well, i did some stages of testing, and for some perfection i did build the Mk5 version 
Ship Build - Spark

Weapon Statistics

Implants

Some people do prefer Booster Circuit, that’s fine too. This build applies to any ammo, just if you take Supercooled switch to Vernier.
I prefer Supernova because i like heavy bubbles.
Hello! Has been a while since i did this…
_______________________________________________
So, major changes occured since I’ve shown my full lineup last time. So I’m doing it again, more detailed, better explained and a bit more fancy.
There will be 4 Posts, one of each of my 4 Ships in my primary lineup in T5 (which I play primarily). I may finish them today, or maybe tomorrow. Depending on the time I have and if I want to do it or not.
Falcon-M (Major Updated) Below.
Spark (Major Updated)
Jaguar
Mauler (Updated)
________________________________________________________________________________
First Spot: Falcon-M 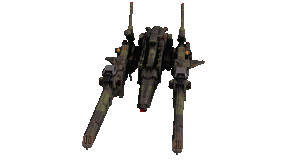
This Ship is meant for heavy assault compressed into one little ship, the ship with the most firepower for it’s size in the whole game. There might ships in the game with higher or way higher base DPS, but considering this ship has Orion, damn high Crits and nice weapon positioning makes this ship looking the Storm Viking like a paintball gun. Although it can be really squishy, this ship being in the hands of a really experienced pilot is the nightmare for anything in this game.
The key of success in this ship is: Evade, keep firing your target while moving, stay alive and never stop your ship during tense combat.
Role: Covert Ops , high firepower and maneuerability compressed into one small ship, although it’s squishy. To understand Covert Opses a bit better, you may watch this:
It’s a Tutorial in a T3 ship, but these rules are pretty much the same in T5.
Made by AdamWest - Another good Cov Ops Pilot.
Strengths :
Small hitbox.
Nice weapon positioning.
Reduced reloading time of Covert Ops modules. - 20%
More Critical Chance than casual Covert Opses. - 40% instead of 30%
Very high firepower in general.
Weaknesses :
Squishy, no possibility to put 2 adaptives.
Not as maneuverable as most Covert Opses with 3 engine slots.
Basics about the Falcon-M
Things you have to do, no matter how you build your ship…
You might watch the video in the spoiler above if you are not certain about Cov Ops Basics.
Passive Modules
This is one of the squishiest Ships in the game, you can make it considerable tanky, but not without dropping Energy Regen, Maneuverability or both.
Considering that, and the fact this ship being a Covert Ops, take an Emergency Barrier!
If you are a true Covert Ops pilot, you will of course use one of the hull slots as Passive Armor , it gives you increased energy regen which gives you stability and increased shield regen during battle, as well as hull regen should you wear regenerative coating, the 2nd hull slot is totally up to you. Take whatever you want. But please, no Armor-Plated or Galvanized.
You have just one shield slot, use that one for adaptive at least, because that’s making you better against all damage on both hull and shield while you fly with Afterburners or under speed buff, you will be flying all the time anyways.
On Engine you will put at least one Vernier as long as you aren’t a iChicken Plasma Gun Spammer from far away. That other one can be whatever, but i suggest take a 2nd Vernier or Collision Compensator if you aren’t that good or your ping sucks. All other passive slots, let them be whatever you like. CPU is deciding how much damage you dish out. But in there it’s your choice if you want to be raw damage dealer or being safe against ECMs & Tacklers. If not a bit of both.
Active Modules
Being a true Covert Ops requires this:
Orion Targeting Complex
Shield Booster S or Repair Kit S , if not both.
If you want to be a bit safe, take both, leaving one spot for you which you can use for whatever you want, but please… Please NO Reactor Overload!
Implants
Following implants are basic Covert Ops and won’t be discussed.
1-3 - You want resistance, you just want it. Basic Implant on any ship in the game.
2-1 OR 2-3, more damage and less lock time or more safety and less spread. Both are fine.
3-3 - Same as in 1-3.
4 - Totally up to you.
5-1 OR 5-2, but on Falcon-M the first one should be your preference as long as you don’t take Plasma Weapons.
6-2, although 6-3 is considerable as well if you take Plasma Gun.
7-2, ask why and I’ll snap your neck.
8-2, same thing as with 7-2.
9, totally up to you. Depending in which situations you come and how you fly this.
10, also up to you. But I don’t see any sense in taking 10-2 if you have passive Armor.
11, totally up to you.
12, Also up to you. but 12-2 is nonsense on Covert Ops.
13, up to you.
14-1, Don’t like debuffs? Instakills which you can not prevent? Avoid xxxx situations? That’s your Crew then.
15, Individual Choice.
That’s the base things you must know about these ships. But below this I’ll show my build in all of it’s details. That’s an aggressive but still not that squishy build. Going on full rotation and mostly made for hunting down enemy ceptors, fighters and squishier frigates. As federation engineers or just nawb frigates.
_____________________________________________________________________________________
Ω ** Falcon-M  **
**
This is going to be my individual version of the Falcon-M, totally made for dealing damage in a short durationg. Devastating firepower and nightmare of everything in space. Posting this to make you able to make your own Space-Nightmare or adapting that you may have better chances to defeat me in battle. (Look how fair I am :3)
I’m going to explain and show my base fitting first. How my ship is fitted, why it is and how I take advantage of it.
Omega: Falcon-M, Space-Nightmare - Build
Setup:

Engine : 2x Vernier for Maximum rotation, this keeps me able to shoot at my enemy no matter how hard he moves.
Capacitor : Emergency Barrier which is already explained in the Basics, must have if you have the Capacitor.
Shield : Adaptive which makes me more tanky in situations where I fly with Afterburners, so always.
Hull : Passive to increase energy regen and make me stable and tankier in tense combat situations.
Kinetic resistance to make me more resistant against Gauss, Mjolnirs in general and Octopus. Better than -5 Kin Res with Lightweight.
CPU : Max. Damage Output, doesn’t maybe look that wise because I do lack the Proton Wall, but I’ve experienced low issues with ECMs, the Implant is enough protection to f*ck with ECMs without making them pregnant.
Active Modules : Orion for even more damage output, it’s a Covert Ops so this is a choice nobody does regret. Both multipurpose modules in topic regeneration for Maximum recovery potential in tense battle and an Adaptive Camo to escape those if necessary or get somewhere without having enemies approaching you.
Weapon

This one with Curved Reflector, since the Curved Reflector has been changed the range has become totally fine for dogfighting, and that’s the only thing you are doing with this weapon so why not improving this aspect for free, stay close while using this weapon, but take care of frigates close to obstacles, keep at least a distance of 300m to them or they can torp the wall and kill you. Do you see that they shoot the torp in your direction, get closer and expect calm situation for 8 sec, that’s the time the torp needs to reload. And the torp can’t hit you if you are too close.
Also combining this damage with the Orion, especially the common Orion in Mk5 causes insane damage over a short duration, it allows to annihilate any ship up to Empire Gunships in one burst. Even squishy frigates can be killed in one strike with this. Combine this with kinetic missiles and become the master of the map.
Also, never forget to rotate around your target if you see that there are more enemies close by, and if you see an ECM. Fly straight to him if so if he stuns you, you won’t be in front of his lens and you’ll be behind him. Also he can not ping you if you are behind him. Once he wasted his Stasis you can keep attacking the target you selected.
Statistics, pure information. Result of the build and nothing to say about this.

Implants/Crews
Another important part. Which highly has an influence in your playstyle and efficiency once you master your implant set.

I’m going to explain this of course, “Base” means I explained it already on the top.
1 - Base
2 - More Damage Output and reduced lock time to aquire the 5% extra damage faster.
3 - Base
4 - I prefer missile speed because I can hit easier with that, piercing missiles are already the fastest and this makes them even more accurate.
5 - iRotation, I’m not a strafe boy and this makes me more maneuverable in attack and escape maneuvers.
6 - More Critical Damage to make my insane Crit Chance even more useful, the others 2 would be nonsense here.
7 - Base, more energy stability.
8 - Base, or die by tacklers.
9 - Seriously, it seems like people do love me as hell. 5 locks all over the time once they see me. Why not taking advantage of that?
10 - The Falcon-M has already reduced reload, adding some power to my Orion.
11 - RoF to optimize my DPS by a bit.
12 - Comes rarely in usage. But if I’m sure I’m alone with my fighter/frig prey, this implant comes in use to increase my damage by an additonal amount.
13 - More damage, just getting 10 kills/assists for 10% more damage, 10% doesn’t seem quite a lot but considering the fact that this buff stacks with others makes it even more powerful.
14 - ECMs can hurt a lot in T5, and this prevents also surprise Motherf*cker Situations from Tacklers. You may almost be dead. But you aren’t dead.
15 - Daaaaamaaaaaaage, even if it’s just 3%. Also both Synergy and Credits everywhere isn’t that bad either.
____________________________________________________________________________________________
These were the basics and my way of playing the Falcon-M, hope you might take advantage of me, by building your own Falcon-M or by killing me 1% easier.
If it helped you in any of these 2 ways. I’d appreciate a like on this post to see if this is worthy for people to have and if I’m going to continue complex guides for single ships or not.
Next Edition will be Omega-Spark, the PewMaster9000.
Cya in Space,
Sincerely, OmegaFighter :012j:
Amazing post !!
The Spark fit will be fun to see. You should think about adding this to the Star Conflict WIKI. It would be much easier to find if someone googled “star conflict Falcon M Build”.
Having a solid WIKI with very well explained ship fits would be really good to see.
There is not a single reason to pick Falcon M over Gray Falcon as Pulse-Laser Anti Interceptor platform.
There is not a single reason to pick Falcon M over Gray Falcon as Pulse-Laser Anti Interceptor platform.
Well, that’s true but these days during eu prime time good pilots that goes on full rotation/dodging/pulse-laser (or with good aim on plasma or such) are rare. Against all the other ceptor fits it’s effective enough and since the damage burst is quite effective in general: the falconM works.
I miss the grey falcon, but at the moment the falcon m is a better choice. You just need to not crash so often. 
There is not a single reason to pick Falcon M over Gray Falcon as Pulse-Laser Anti Interceptor platform.
I never mentioned that I play it Anti Ceptor only, I said it’s good for it as well.
Also, good reasons to prefer Falcon-M
More Dmg at the end.
Less wobble because less rotation.
R14 Implant which let’s ECMs suck… things.
Rotation is a nice thing. But for general purposes the Falcon-M does better at the end. I’ve flown Grey Falcon for a long while and I know the difference, for my kind of playstyle the Falcon-M does better at the end. I’m posting the ship I’m flying atm, which is Falcon-M and not the Grey Falcon.
You not necessary need full rotation on a GF (specially considering ping) but what you are capable of due it’s “4” engines, you can have same rotation as Flacon-M, get strafe boost on top of that and still have 1 engine free, which works great with Pulses - Shard cooler.
Technically, after averaging crit/critDmg into a DPS, Falcon M does more dmg per second, about 7% , but FalconM (unless you use shared cooler on it as well) you are not gonna have enough Up time to even use full Orion (like in Omegas Screenshot) while GF will have longer cycles than orion duration


The moment you hit your over heat cap on FM and have to shoot more you are doing considerably less dmg than GF.
I never mentioned that I play it Anti Ceptor only, I said it’s good for it as well.
I said “Pulse-Laser Anti Interceptor platform”, because interceptors are the only targets where overheat does not contribute as much as any case of other “bulkier-less manoeuvrable” targets. Vs fighters and Frigates (and lets be honest, how many interceptors actually die in 2.8 seconds? I can beat my liver that it is far from 1 every 30 seconds) So if you are not using exclusively as Anti Interceptors, you are hindering yourself.
14-1 implant works once in 4 minutes, and considering you are using 13-3 you are not really planing on dying and considering the duration of games how many times per games does it actually help when it is needed.
All of that comes in a more manoeuvrable and tankier GrayFalcon.
Stuff
Instead of throwing my numbers on my head, try it out yourself. It’s working fine. And you can also break Guards, of course not as easy as with Shared Cooler Grey Falcon, but it works, and 2,8 seconds is absolutely enough with Orion to rek a fighter. No question on that one.
I’m not going to change my builds because you say so. I tried a lot of stuff and I’m feeling good with this one. Is that a problem?
I understand your critism and I agree that Grey Falcon has advantages in some points, but Falcon-M is still better for my purposes, and my builds is the topic here in this thread, also i mentioned a base build. So nobody is forced to take mine at all.
Instead of throwing my numbers on my head, try it out yourself. It’s working fine. And you can also break Guards, of course not as easy as with Shared Cooler Grey Falcon, but it works, and 2,8 seconds is absolutely enough with Orion to rek a fighter. No question on that one.
I’m not going to change my builds because you say so. I tried a lot of stuff and I’m feeling good with this one. Is that a problem?
It is not.
But I also feel like a waste of orion the PL without shared cooler or high oscilation ammo. (I use high oscilation ammo on the Falcon M)
Of course, I fly all my interceptors without the 8-2 implant so I’m not here for judging others’ builds.
It is just my opinion.
Same pattern as the Falcon-M guide, to make it a bit easier for me and easier for you.
Enjoy it!
Second Spot: Spark 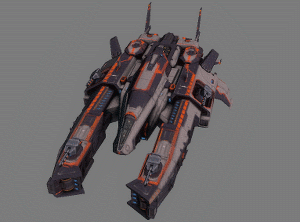
This ship is just a raw killing machine, by being considerable tanky and having a nice, smooth design, this ship is coming with the most terrifying Firepower you are going to see on any gunship.
This ship does come with 25% more Main Weapon Damage, this makes the ship like having it 5 guns instead of 4. Which is really strong, and makes it very strong with any weapon. It’s passive buffs do not force you to take a special weapon and it slots allow you to actually put any weapon. But if you take Bubbles or Flux Phaser you will HAVE TO trade maneuverability with the ability to shoot for a longer duration. Which makes this ship an easier target for interceptors. Be aware of that. Still, if you are good enough most interceptors will not even get behind you, because you kill them first. But these shall not be your main targets. With the firepower you’ve got on this one, you should focus on breaking frigballs and annihilate other fighters in tiny durations. Although this is the most popular Gunship in T5 and being used by many pilots. By mastering this ship you can still keep the upper hand.
Also, an insane advantage of this ship is that it is energy stable in base if you have the 7-2 implant, which allows you to afterburn all the time and still have enough energy left.
The way to success on this beauty is: Don’t let interceptors get behind you, never get in front of a Guard, keep firing in situations you know that you are going to die and keep the enemy engineer dead.
Role: Gunship , insane firepower, fair maneuverability with most weapons under Vernier engine, tanky and not really that slow. One of the few energy stable Empire Gunships.
Strengths :
Nice design.
Nice weapon positioning.
More Damage Buff than common EGunships, 25% instead of 15%
Bonus thermal resistance which allows you to resist most kinds of weapons and missiles a bit longer.
Very high firepower in general.
Energy stability in base with 7-2.
Weaknesses :
Low maneuverability if you put smth else than Vernier Engine.
Basics about the Spark
Things you have to do, no matter how you build your ship…
Take full advantage of that high firepower by improving it even further, this ship is capable of being good with any weapon avaible for fighters.
Passive Modules
This can change with any weapon you are going to put, and in this area you are actually not forced to put anything. But I still might recommend things for you.
Base build, recommended modules in general for this ship, which you should take.
Engine - Vernier Engine or Shared Cooler, depending on your weapon. Inertial Stabilizer isn’t bad either with Gauss, but I’m not a big friend of it.
Capacitor - You are allowed to put one Pulse Discharger while staying energy-stable, use this Advantage and put one. The 2nd one can be used for an Emergency Barrier or an Iridium Heatsink.
Emergency Barrier might sound a bit stupid, but it Isn’t, even if you are pretty big and slow. This can save your life anyways. Try it out and you’ll see. Finisher Torps, dying by Disintegrator if you are almost dead or Getting onehitted by Doomsdays at 80% HP is not going to happen. This is quite useful to finish a target in the last second or stay alive in general.
Hull - Totally base, one Kinetic resistance module and one Reinforced Beams, also put one Galvanized to get almost 100 resistance against all damage types, if you have the booster “Diamond Coating” you will even have more than 100 on all types of damage. Reinforced Beams aren’t bad because you’ll still keep your speed. You can also put Armor-Plated Hull, but I’d want to stay with that bit of speed I’ve got.
CPU - That’s a tough one, you actually have to decide on your own. Because this changes dramatically with each weapon. Proton Wall and the Sensor Range / Lock Time module aren’t that recommended on Empire Gunships. All other modules are totally fine to put, but try not to take 3 times the same.
Active Modules
Become the true PewMaster and use the force…
…of a Combat Reboot! It’s Invulnerability! I-N-V-U-L-N-E-R-A-B-I-L-I-T-Y! It also interrupts all current negative effects no matter if you are stunned or not. The only thing that can prevent you from using this module is the lack of energy. Consider this as Master-Counter to ECMs. They can’t stun you, no chance. Even if they try to drain your energy. If they are not really, really good you can just use Combat Reboot once they activate Energy Drain and they’ll throw all their other modules on you while you are obviously invulerable. This goes for about 2,5 seconds. Depends on implants at the end.
…of a Repair Kit M! It gives you strength and potential to regenerate during tense battle. It allows you a nice comeback on your enemy even if you are almost dead. And makes you able to use this ship even without having an engineer, and this situation isn’t that rare.
…of an Aiming Overcharge! Almost 50% more Critical Chance for 9 seconds, with a considerable low recharge time the buffed Aiming Overcharge allows you to use this very often. Making your enemy suffering even more often and laughing you at him. If your critical damage is decent this is totally worthing it.
…of an Engine Overcharge! A decent speed buff to reach your target pretty fast or escape if necessary. This module has been buffed as well and is really useful from now on. It was before too but not like it is now.
Implants
Following implants are basic Empire Gunship and won’t be discussed.
1-3 - You want resistance, you just want it. Basic Implant on any ship in the game.
2-1 OR 2-2, more damage and less lock time or more (sensor) range. Both are fine. But take the 2-2 only if you want Long Range Gauss or Railguns with more range.
3-3 - Same as in 1-3.
4 - Totally up to you.
5-1 OR 5-2, but on Spark the first one should be your preference as long as you don’t take Gauss Cannon, and then you should be aware of the increased risk of an Inty dominating you.
6 - I’d say this one is up to you, but 6-2 is best for most weapons, 6-3 is what you’re going to take if you take Gauss.
7-2, This makes the Spark energy stable under the most circumstances, you can fly it unstable as well, but it’s not recommended.
8-1, to reduce the recharge time of your Repair Kit M by a decent amount, you do not rely on your speed so Tacklers shouldn’t become a problem for you, also for emergency you still have the Combat Reboot.
9-1, You’re slow and you deal most damage, people will want you dead. And you’re tanky. So this is what you’re going to want if you want to stay alive.
10, also up to you. But I don’t see any sense in taking 10-2 if you have passive Armor.
11, totally up to you.
12, Up to you. but 12-2 is almost nonsense on the Spark.
13, up to you.
14, up to you too.
15, Individual Choice, always.
That’s the base things you must know about this ship. But below this I’ll show my build in all of it’s details. That’s a sniper build, the true PewMaster. It’s not designed to fullfill it’s purpose as guard-breaker, but it still has nice damage output and is able to take any ship on it’s own except guards. But tbh, for these you’ve got your team. Once you erased everything else the guards shouldnt be your problem.
_____________________________________________________________________________________
Ω Spark
This is going to be my individual version of the Spark, totally made for sniping away smaller targets and dealing damage over time. Decent firepower per shot and a true PewMaster. Posting this to make you able to make your own Space-PewMaster or adapting that you may have better chances to defeat me in battle. (Look how fair I am :3)
I’m going to explain and show my base fitting first. How my ship is fitted, why it is and how I take advantage of it.
Omega: Spark, PewMaster 9000 - Build
Setup:

Engine : 1x Vernier Engine to increase rotation to deal better with Interceptors and adapt faster to my enemies’ movement. Quite useful and the best thing you can take if you want to be precise while using Gauss.
Capacitor : Emergency Barrier to survive surprise situations and leaving me more time to deal with my enemies, saves your life about 33% of the time you would’ve died. Took Pulse Discharger to take optimum advantage of my damage per shot and of my decent energy regen, my ship does stay energy stable at 150 en units / second, while my afterburner does consume 146en/sec.
Hull : One Reinforced Beam to take more advantage of my high resistances and to survive a bit longer in tense combat, don’t want to drop speed so I didn’t take the Armor-Plated Hull. Kinetic to fill the Kinetic hole. You’re still getting lots of Damage from Kinetic weapons. But without this you stay no chance against the current Railguns, Gauss, Shrapnel and Mass Driver. Galvanized for Resistance optimization and putting res on 95-99-99 without Diamond Coating. Makes me resisting about 50% of ALL incoming damage if there is no Target Painter on me.
CPU : Max. Alpha Damage while having a decent range. One Horizon to put my Range on 5km, which is totally enough. One Infrared to make my Base Crit Chance 10% higher and my charged Crit Chance 20% higher. One TTC to take max. advantage of my Aiming Overcharge and nice consistent Alpha Damage while using it.
Active Modules : Repair Kit M to have the opportunity to make a nice combat during combat, to survive surprise strikes or to revive myself if I lack the engineer. Always a good choice on hull tank. Aiming Overcharge to make my Gauss nice for spamming for 9 seconds. This will make me critting almost every time i shoot and dpes even make frigates suffer a bit. Engine Overcharge to escape too tense situations, reach my target faster or get to the next beacon. Combat Reboot because I’m not stupid, this is pure Invulnerabilty and the thing which makes the Gunship a Gunship. Also it allows me to absorb infinite damage over short time and resist ECMs.
Weapon

Taking the critical Ammo here, to optimize my critical chance in base and fully charged, Could have taken even more Proj Speed but I’m not interested in dropping even more projectile speed and this should be enough to fullfill it’s purpose. But I’m not going with fully charged shots only, that’s why I’m still using 11-2 and not 11-1, even if it’s just a difference of 5 shots per minute it’s a noticable difference, although 7 less resistance pts on the enemy aren’t bad either, it’s your choice up here. But that’s what I’m using though. This weapon is meant for a hybrid purpose, taking down enemies from far range by hitting the left mouse button and by finishing and dealing insane damage with charged shots, a true killstealer weapon. Pay attention on cloaked Covert Opses, they might ruin your day. You can hit them when they are cloaked, even with this weapon. It’s not that hard. But once they’re less than 100m close to you, you have low chances in hitting them easily. So try to keep distance to enemies, even if they try to get to you.
Missiles , here I do take the EM missiles, precise and opposite damage type of my Gauss, allows me to do nice damage to Guards and hit Ceptors easily.
Statistics, pure information. Result of the build and nothing to say about this.

Implants/Crews
Another important part. Which highly has an influence in your playstyle and efficiency once you master your implant set.

I’m going to explain this of course, “Base” means I explained it already on the top.
1 - Base
2 - More Damage Output and reduced lock time to aquire the 5% extra damage faster. This Crit Chance is specially important on Gauss.
3 - Base
4 - I prefer missile turning speed because I can hit easier with that, plasma missiles already have the nice rotation but this makes them even more precise.
5 - iRotation, to adapt to my enemies moves and still stay a better chance in dogfight against ceptors, it’s hard but not hopeless.
6 - In this i go to Projectile Speed, otherwise It’s way too hard with the Gauss, it’s the only way to boost Proj Speed on Spark without the ammunition.
7 - Less energy comsumption, makes me energy stable and allows me using the afterburners as i wish.
8 - Reduce reload time of Repair Kit M to have it avaible when you need it more often.
9 - Seriously, it seems like people do love me as hell. 5 locks all over the time once they see me. Why not taking advantage of that? + It’s tank already, makes it even tankier.
10 - 10% recharge time reduction, doesn’t seem that much but It’s something and definitely worthing it. 3 seconds on combat reboot can make a difference between death and life.
11 - RoF to optimize my DPS by a bit. And having the possibility to spam with the weapon a bit better under Overdrive and Aiming Overcharge. - 11-1 is a totally fine choice as well.
12 - With Gauss you are staying around most of the time, this gives you 7% more free damage on that nice weapon.
13 - More damage, just getting 10 kills/assists for 10% more damage, 10% doesn’t seem quite a lot but considering the fact that this buff stacks with others makes it even more powerful. Also it’s my fav implant.
14 - 2 Seconds of cloak don’t seem to be a lot. But it’s enough to confuse your enemy and do repositioning to get him down.
15 - Daaaaamaaaaaaage, even if it’s just 3%. Also both Synergy and Credits everywhere isn’t that bad either.
____________________________________________________________________________________________
These were the basics and my way of playing the Spark, hope you might take advantage of me, by building your own Spark or by killing me 1% easier.
If it helped you in any of these 2 ways. I’d appreciate a like on this post to see if this is worthy for people to have and if I’m going to continue complex guides for single ships or not.
Next Edition will be Omega-Jaguar, the ChickenBrawlerHD.
Cya in Space,
Sincerely, OmegaFighter :012j:
___________________________________
Awaiting high quality critism from Kostyan
It is not.
But I also feel like a waste of orion the PL without shared cooler or high oscilation ammo. (I use high oscilation ammo on the Falcon M)
Of course, I fly all my interceptors without the 8-2 implant so I’m not here for judging others’ builds.
It is just my opinion.
Which is fine. But I’m going here to submit my builds which i were thinking about for a long while. And I’m fine with them, each pilot gets his personal playstyle, way of life and opinion.
But I’ll not sacrifice my 2nd Vernier and I’ll not change to Grey Falcon because ECMs kinda love me. Wakizashi AE <Waka<Waka<Waka< Grey Falcon
You see I’ve got no Shared Cooler, take advantage of this if you see me again. It’s not like I’d be using this because it doesn’t work at all.
You cant handle criticism well, can you.
You cant handle criticism well, can you.
=)
Which is fine. But I’m going here to submit my builds which i were thinking about for a long while. And I’m fine with them, each pilot gets his personal playstyle, way of life and opinion.
But I’ll not sacrifice my 2nd Vernier and I’ll not change to Grey Falcon because ECMs kinda love me. Wakizashi AE <Waka<Waka<Waka< Grey Falcon
You see I’ve got no Shared Cooler, take advantage of this if you see me again. It’s not like I’d be using this because it doesn’t work at all.
As I told you, I don’t use shared cooler. I use high oscilation ammo. I never liked the short range of the curved pulses. I don’t think it is worth the extra DPS.
As I told you, I don’t use shared cooler. I use high oscilation ammo. I never liked the short range of the curved pulses. I don’t think it is worth the extra DPS.
That’s totally personal taste. Which is fine, above I’ve just posted how I do it.